

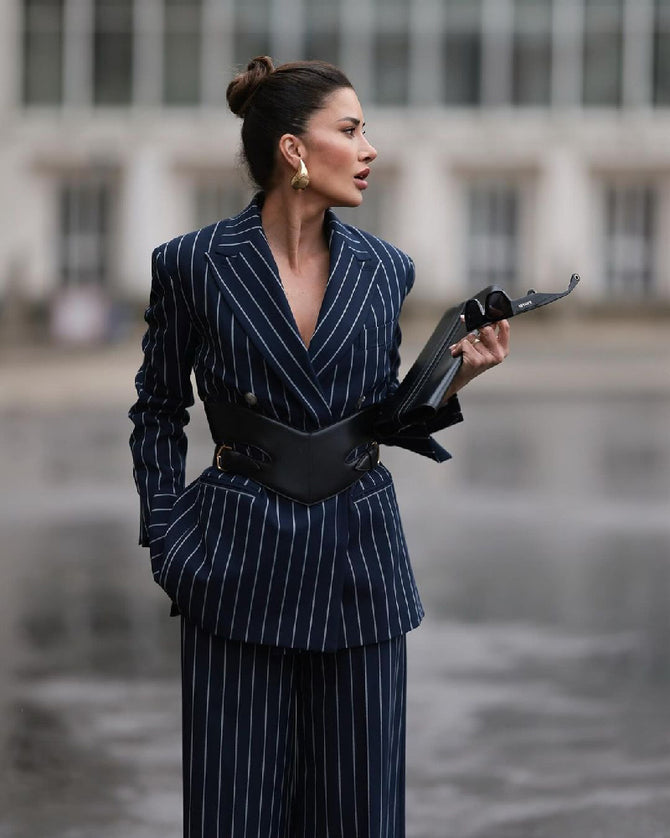


You can wear the same dress two completely different ways just by changing how you tie the belt. A neat front knot reads effortless. A crisp bow looks romantic. A wrapped “obi” style feels fashion-forward. And a back tie can make the front of your dress look clean and elevated—especially in photos.
If you’ve ever wondered how to tie a belt for a dress (or why your sash keeps sliding, twisting, or sitting in the wrong spot), this guide walks you through the most flattering belt placements, the best knots and bows, and step-by-step techniques for self-tie belts, sash belts, and wrap dress ties. You’ll also learn exactly how to keep your belt in place, how to tie it for your body shape, and how to style it for casual, work, and special occasions.
Whether your dress came with a belt or you’re adding one to define your waist, here’s the goal: make the belt look intentional, feel comfortable, and stay put all day.
Quick Jump Links
- Dress Belt Basics: Belt vs. Sash vs. Tie Belt
- Where to Tie a Belt on a Dress (Waist, High Waist, Low Waist)
- Before You Tie: Quick Prep for a Clean, Non-Slipping Belt
- 5 Best Ways to Tie a Dress Belt (Step-by-Step)
- How to Tie a Wrap Dress Belt (So It Doesn’t Come Loose)
- How to Tie a Belt for Different Dress Styles
- How to Tie a Belt for Your Body Shape
- Troubleshooting: Twisting, Sliding, Bulky Bows & More
- Styling Tips: Shoes, Jackets, Jewelry & Proportions
- How to Tie a Dress Belt for Every Occasion
- Care Tips: Keeping Sash Belts Smooth
- Shop Dresses & Belting-Friendly Styles at Uoozee
- FAQ
Dress Belt Basics: Belt vs. Sash vs. Tie Belt
Not all “dress belts” behave the same way, and knowing what you’re tying helps you pick the right knot.
1) Classic belt (with holes or a buckle)
This is the easiest: you thread it through loops (if your dress has them) and buckle it like jeans—done. Styling comes from placement (high waist vs. natural waist) and belt width (thin = delicate, wide = statement).
2) Sash belt (fabric tie that comes with the dress)
A sash belt is usually made from the same fabric as the dress. It’s soft, can slip, and can look bulky if you tie it the wrong way. The upside: it’s adjustable, flattering, and can create a “custom” waistline.
3) Self-tie belt (separate tie belt, often long and narrow)
This is common on shirt dresses, knit dresses, and casual dresses. It’s long enough to wrap around once or twice and can be tied in multiple ways—front knot, side bow, or wrapped and tucked.
4) Wrap belt / obi belt (very wide, wraps multiple times)
Obi or wrap belts are designed to be wrapped around your midsection and tied or tucked. They create structure and a fashion-forward silhouette. They’re also great when your dress has no belt loops.
Where to Tie a Belt on a Dress (Waist, High Waist, Low Waist)
Before you tie anything, decide where the belt should sit. This is the difference between “I threw a belt on” and “this outfit is styled.”
Natural waist (most universally flattering)
Your natural waist is the narrowest part of your torso, usually above your belly button and below your ribcage. Tying your dress belt here creates a balanced silhouette and works for most dress styles.
High waist / empire-ish (legs-for-days effect)
Placing the belt slightly higher—closer to the underbust or ribcage—makes your legs look longer and can be great for flowy dresses, maxi dresses, and looser fits. This is also a smart move if you want to avoid emphasizing the mid-belly area.
Low waist / hip (relaxed, modern, not always forgiving)
Wearing a belt lower can look intentionally relaxed and cool on straight dresses or oversized shirt dresses, but it can also shorten the legs if the proportions are off. If you try a low belt, keep the belt slimmer and avoid bulky bows.
Pro tip: Use your mirror, not the tag
Some dresses have a “designed waistline,” but your best look might be 1–2 inches above or below it. Tie, step back, take a quick photo, and check where your silhouette looks most balanced.
Before You Tie: Quick Prep for a Clean, Non-Slipping Belt
If your belt looks messy or slides around, it’s rarely “your tying skills.” It’s usually the setup.
Step 1: Smooth the dress fabric
Pull the dress gently down and smooth any bunching at the waist. A belt tied over wrinkled fabric will twist and migrate.
Step 2: Center the belt (or intentionally offset it)
Find the belt’s midpoint and align it with your belly button for a centered front tie—or shift it 2–4 inches to the side if you plan a side knot/bow.
Step 3: Decide if you’re wrapping once or twice
Long tie belts often look neater when wrapped twice because the tension is distributed. Shorter sashes generally look best wrapped once to avoid bulk.
Step 4: Add “grip” if the sash is slippery
- If your dress has belt loops: use them (even if it feels obvious). They are there to stop sliding.
- If no loops: consider a tiny safety pin on the inside (pin sash to seam), or use fashion tape where the sash crosses.
- If fabric is satin/silky: choose a knot (not just a bow) or do a wrap-and-tuck method.
Now you’re ready for the actual tying methods.
5 Best Ways to Tie a Dress Belt (Step-by-Step)
Below are the most wearable, photo-friendly ways to tie a belt for a dress. Each one includes when to use it, how it looks, and exactly how to tie it.
Method 1: The Classic Front Knot (clean, minimal, stays put)
Best for: everyday styling, shirt dresses, knit dresses, casual dresses, when you want a modern look without a big bow.
Why it works: A flat knot is less bulky than a bow and usually holds better on slippery fabric.
- Step 1: Wrap the belt around your waist so both ends are equal length in front.
- Step 2: Cross the right end over the left end.
- Step 3: Pull the right end under and through (like starting to tie shoelaces) and tighten gently.
- Step 4: For a flatter knot, fold one end into a small “U” shape and wrap the other end around it once.
- Step 5: Tuck the wrapping end through the loop you created and pull to tighten.
Finish tip: Angle the ends slightly downward (a soft “V”). It looks intentional and slims the center.

Method 2: The Side Knot (most flattering in photos)
Best for: when you don’t want attention at the center of your torso, plus-size styling, apple shapes, and dresses with prints.
Why it works: A side knot creates asymmetry, which reads stylish and often looks slimmer in pictures.
- Step 1: Wrap the belt around your waist and shift the belt midpoint 2–4 inches to the left or right.
- Step 2: Cross the ends at the side point.
- Step 3: Tie a simple flat knot (as in Method 1, Steps 2–3).
- Step 4: Tighten just enough to define your waist; don’t cinch so hard the fabric puckers.
Finish tip: Keep the knot slightly forward of your hip bone (not directly on your side seam) for the most flattering angle.

Method 3: The Classic Bow (feminine, romantic, “dressy”)
Best for: weddings, date nights, brunch, fit-and-flare dresses, and any dress where you want a soft, pretty focal point.
Why it works: A bow signals “occasion.” The key is keeping it proportional so it doesn’t look bulky.
- Step 1: Wrap the belt around your waist with equal-length ends.
- Step 2: Tie the first knot (right over left, pull through) and flatten it.
- Step 3: Make a loop (“bunny ear”) with the left end.
- Step 4: Wrap the right end around the loop and push it through to create the second loop.
- Step 5: Pull both loops evenly to tighten.
- Step 6: Adjust: one loop slightly bigger than the other can look more natural and less “perfect.”
Finish tip: For a slimmer look, do the bow slightly off-center (front-left or front-right).

Method 4: The “Bow-Knot Hybrid” (bow look, knot security)
Best for: slippery sashes, satin-like fabrics, windy outdoor events, and long days where you don’t want to re-tie.
Why it works: It looks like a bow but locks like a knot.
- Step 1: Tie a flat knot (Method 1, Step 3) and tighten.
- Step 2: Make a small loop with one end (keep it smaller than a normal bow loop).
- Step 3: Wrap the other end around the loop once (snugly).
- Step 4: Tuck the wrapping end through to form a second loop, but keep it short—more “petal” than “bunny ear.”
- Step 5: Tighten the loops and flatten the shape.
Finish tip: Let the tails hang longer than the loops. This keeps the bow from looking puffy.

Method 5: Wrap-and-Tuck (no knot showing, ultra sleek)
Best for: minimalist outfits, workwear styling, bodycon/column dresses, and when you want the front of your dress to look clean.
Why it works: It’s a “hidden tie belt” look. Perfect if you dislike bows or bulky knots.
- Step 1: Wrap the belt around your waist once and cross the ends in front.
- Step 2: Wrap each end around your waist to the back (or continue wrapping if the belt is long enough for two wraps).
- Step 3: At the back, tie a small flat knot OR simply tuck the ends under the wrapped belt layer.
- Step 4: Smooth the belt from the front and sides so the wrap is even.
Finish tip: This method looks best when the belt is medium-width and not too stiff.

How to Tie a Wrap Dress Belt (So It Doesn’t Come Loose)
People specifically search how to tie a wrap dress belt because wrap dresses can loosen as you move—especially if you tied the bow without enough tension or the fabric is slippery.
First: Check the inner tie (the hidden anchor)
Most wrap dresses have an inner tie or button that anchors one side. Secure that first. If you skip it, the belt has to do all the work—and it will drift.
Secure Wrap Method (recommended)
- Step 1: Fasten the inner tie (or inner button/hook).
- Step 2: Wrap the outer panel across your body and pull it snug (not tight enough to pucker).
- Step 3: Bring the belt ends to the side where the belt exits the dress (often your right side).
- Step 4: Tie a flat knot first (right over left, pull through). This is the “lock.”
- Step 5: Decide: finish with a bow (prettier) or a second knot (more secure). For long wear, use the bow-knot hybrid from Method 4.
Extra security if you’re worried about gaping
- Add a small safety pin on the inside at the neckline crossover (pin fabric to fabric, invisible from the outside).
- Use fashion tape at the bust line to prevent shifting.
- Choose a side tie instead of a centered bow to reduce tugging at the front.
How to Tie a Belt for Different Dress Styles
The same knot can look perfect on one dress and awkward on another. Here’s how to match the tie style to the dress silhouette.
Shirt dress (structured casual)
Best ties: classic front knot, side knot, wrap-and-tuck.
Why: Shirt dresses look sharp when the belt looks minimal. A giant bow can fight the collar and buttons.
- If the dress is oversized, try a high waist placement to create shape.
- If the dress is already fitted, keep the knot small and neat.
Fit-and-flare dress (romantic, “occasion-ready”)
Best ties: classic bow, bow-knot hybrid, side bow.
Why: This silhouette loves a feminine focal point and a defined waistline.
Maxi dress (flowy, elongating)
Best ties: side knot, wrap-and-tuck, small front knot.
Why: Too much bulk at the waist can disrupt the long vertical line. Keep it sleek, especially with prints.
Sweater dress / knit dress (cozy but can look flat)
Best ties: classic front knot, wrap-and-tuck, buckle belt.
Why: Knits can stretch; a bow can loosen. A knot or tucked wrap holds better and looks cleaner.
Bodycon / column dress (minimal, modern)
Best ties: wrap-and-tuck, small side knot, buckle belt.
Why: The dress is already sleek. Choose a belt style that enhances shape without adding volume.
Wrap dress (already designed for tying)
Best ties: secure wrap method + side knot/bow.
Why: Wrap dresses look best when the tie aligns with the dress’s natural wrap direction.
Tunic dress / straight shift dress (add shape)
Best ties: high waist front knot, wide wrap belt (obi), classic belt with buckle.
Why: These dresses can look boxy. A belt creates structure and defines your silhouette instantly.
How to Tie a Belt for Your Body Shape
There’s no single “right” way to belt a dress, but there are shortcuts to finding the most flattering result for your proportions. Use these as starting points—then adjust based on how you feel.
Hourglass (balanced shoulders and hips)
Try: natural waist placement, classic bow or front knot.
Tip: Keep the belt centered or slightly off-center. Your waist definition is the star—no need for extreme styling tricks.
Pear shape (hips wider than shoulders)
Try: natural waist or slightly high waist + side knot.
Tip: A side tie draws the eye upward and keeps attention away from the widest part of the hips. Pair with a neckline detail (V-neck, wrap, or statement earrings) to balance proportions.
Apple shape (fuller midsection, great legs/arms)
Try: high waist placement + side knot or wrap-and-tuck.
Tip: Avoid a bulky bow centered on the tummy. A higher belt creates shape under the bust and lets the dress flow smoothly over the midsection.
Rectangle (straight up-and-down)
Try: natural waist with a bow, or an obi/wrap belt for curve.
Tip: A slightly wider belt or a bow creates the illusion of a defined waist. Don’t be afraid of a statement tie—this is where it shines.
Petite (shorter frame)
Try: high waist placement + small knot or wrap-and-tuck.
Tip: Keep knots small and tails shorter so they don’t visually “cut” your torso. A monochrome belt (similar color to the dress) also elongates.
Tall (long lines)
Try: natural waist with longer belt tails, side bow, or double-wrap belt.
Tip: You can carry longer proportions beautifully—use that. A longer sash tail can look editorial on tall frames.
Troubleshooting: Twisting, Sliding, Bulky Bows & More
If your tie belt looks “off,” it’s usually one of these issues—and each has an easy fix.
Problem: The sash belt keeps sliding up or down
- Fix 1: Tie the first knot tighter (then adjust comfort after).
- Fix 2: Use belt loops if available.
- Fix 3: Add a hidden safety pin on the inside at the side seam to anchor the sash to the dress.
- Fix 4: Switch to a side knot (less movement at the center).
Problem: The belt twists and looks messy
- Fix 1: Before tying, run your hands along the sash to flatten it from end to end.
- Fix 2: After the first knot, flatten the knot area with your fingers, then tie the bow or second step.
- Fix 3: If the belt is too soft, try a wrap-and-tuck style—no visible twist-prone tails.
Problem: The bow looks too big or “puffy”
- Fix 1: Make smaller loops and longer tails.
- Fix 2: Tie the bow slightly off-center to look more natural.
- Fix 3: Use the bow-knot hybrid (Method 4) for a slimmer bow shape.
Problem: The knot sits too high and makes the torso look short
- Fix 1: Lower the belt 1–2 inches toward the natural waist.
- Fix 2: Move the knot to the side (visually lengthens the center line).
- Fix 3: Keep the belt color close to the dress to reduce contrast at the waist.
Problem: The wrap dress tie comes loose during the day
- Fix 1: Secure the inner tie first (always).
- Fix 2: Tie a flat knot before adding a bow.
- Fix 3: Use a small safety pin or fashion tape at the neckline crossover if needed.
Problem: The belt ends are uneven and it looks accidental
- Fix: Re-center the belt before tying. If you want uneven lengths, make it intentional: one tail noticeably longer (not just “oops”).
Styling Tips: Shoes, Jackets, Jewelry & Proportions
Once you’ve nailed how to tie a belt on a dress, the rest is about making the outfit look balanced from head to toe.
Match belt “visual weight” to the dress
- Light, floaty dress: soft sash, small knot, or side bow.
- Structured dress: classic belt with buckle or a firm front knot.
- Minimal dress: statement belt (wider wrap belt or contrasting color) can be the styling moment.
Coordinate with your shoes (not necessarily “match”)
Matching belt + shoes can look polished, but it can also feel dated if it’s too exact. A modern approach is to coordinate undertones:
- Warm neutrals (tan, camel, cream) with gold jewelry.
- Cool neutrals (black, gray, white) with silver jewelry.
- Bold belt color echoed in a small accessory (earrings, bag, or lipstick).
Use jackets to frame the belt
Outer layers can either highlight your waist or hide it. If you want the belt to show:
- Choose a cropped jacket or a blazer that ends near the waist.
- Wear the layer open to create vertical lines down the front.
- If wearing a long coat, consider a wrap-and-tuck belt style for a clean midsection.
Keep the tie style aligned with the vibe
- Minimalist / work: front knot or wrap-and-tuck.
- Romantic / feminine: bow or side bow.
- Modern / editorial: obi wrap belt or long tails tied at the back.
How to Tie a Dress Belt for Every Occasion
Same dress, different event? Your belt tie can do the “dress code translation.”
Everyday casual (errands, coffee, daytime plans)
Go for: classic front knot or side knot.
Why: It’s quick, comfortable, and looks styled without trying too hard.
Work / office (polished, clean lines)
Go for: wrap-and-tuck or a neat flat knot.
Why: A big bow can read too playful for some workplaces. Sleek ties look professional and streamlined.
Date night (romantic, intentional)
Go for: classic bow slightly off-center or bow-knot hybrid.
Why: It creates a flattering waist and a soft focal point—perfect for photos and dinner lighting.
Wedding guest / party (dressier styling)
Go for: side bow, bow-knot hybrid, or a structured buckle belt.
Why: A refined tie looks “occasion-ready.” Just keep the proportions balanced with the dress fabric.
Travel (comfort + looks good all day)
Go for: side knot or wrap-and-tuck.
Why: Less bulk, fewer re-ties, and it stays flattering after sitting and walking.
Care Tips: Keeping Sash Belts Smooth
Sash belts can wrinkle and curl, especially if you store them tied. A few small habits keep them looking crisp:
- Untie before storing to avoid permanent creases at the knot.
- Hang the belt over a hanger bar or fold it loosely.
- Steam lightly (especially for viscose/rayon blends) to flatten twisting.
- For very soft sashes: consider tying with a flat knot instead of a tight bow to reduce wrinkling.
Shop Dresses & Belting-Friendly Styles at Uoozee
A great belt tie is the finishing touch that makes a dress look tailored to you—whether you love a neat front knot, a romantic bow, or a sleek wrap-and-tuck. If you’re building a wardrobe that’s easy to style (and easy to rewear), choose dresses that work beautifully with belts: wrap silhouettes, shirt dresses, midis, maxis, and pieces with defined waists.
Browse belting-friendly styles at uoozee.com and look for dresses that make waist definition effortless—especially if you love changing your look with just one styling detail.
You can also use the site search for keywords like “wrap dress,” “shirt dress,” “midi dress,” “maxi dress,” and “tie waist” to find styles that look great with a belt.
FAQ: How to Tie a Belt for a Dress
How do you tie a belt on a dress so it stays tight?
Start with a flat knot (right over left, pull through) before you add a bow. For slippery fabric, use a bow-knot hybrid or a wrap-and-tuck method. If the dress has belt loops, thread the belt through them to stop sliding.
Where should a belt sit on a dress?
Most of the time, the most flattering placement is the natural waist (the narrowest part of your torso). For a leg-lengthening effect, move it slightly higher. For a relaxed look on oversized dresses, you can wear it lower—just keep the knot minimal.
How do you tie a sash belt nicely?
Flatten the sash first, tie a flat knot to reduce bulk, then choose a side knot or a bow that’s slightly off-center. Keep loops smaller and tails longer for a polished, not-puffy bow.
How do you tie a wrap dress belt so it doesn’t come undone?
Secure the inner tie/button first, then tie a flat knot on the outside before finishing with a bow. If you’re worried about loosening, choose the bow-knot hybrid for extra security.
Should you tie a dress belt in the front or on the side?
Front ties look classic and balanced, while side ties often look more flattering and modern—especially in photos. If you don’t want attention at the center of your torso, a side knot is usually the best choice.
How do you tie a belt on a dress without loops?
Use a wrap-and-tuck method, a wide wrap/obi belt, or a flat knot tied snugly. If the belt slips, add a hidden safety pin on the inside at a side seam or use fashion tape where the belt crosses.
What’s the easiest way to belt a dress quickly?
The classic front knot is the fastest: wrap, cross, pull through, and flatten. If you want it even faster (and cleaner), do a wrap-and-tuck and hide the ends at the back.
How do you make a bow on a dress belt look smaller?
Make smaller loops and keep longer tails. Tie the bow slightly off-center and flatten the loops with your fingers so the bow looks sleek instead of puffy.
Can you belt a flowy maxi dress without looking bulky?
Yes—use a small side knot, a wrap-and-tuck method, or a slimmer belt. Avoid oversized bows and keep the belt placement at the natural waist or slightly higher to maintain a long, flattering line.
What belt tie looks best for a shirt dress?
A flat front knot, a side knot, or a wrap-and-tuck looks best on shirt dresses because these ties complement the structured, button-front look without adding too much volume.
